Sunday, May 31, 2009

Butter Cake

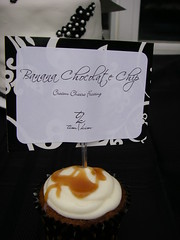
Thank you sunset magazine, I've been looking for a vanilla cake to add to my repertoire, this worked very well. I made 2 9 inch cakes and then sliced them into thin layers and sandwiched them with a chocolate buttercream. I didnt follow their recipe, I just made my usual chocolate buttercream. It was yummy.

The only downside with it is that it uses cake flour, and that makes it much more expensive than a cake with all purpose flour. If anyone knows a good cheap source for cake flour I would be eternally grateful, the only stores that carry it are ralphs, vons and albertsons and its hellish expensive.

I made it for a friend, so I didnt obsess about getting the decoration perfect, I had my first play with modelling chocolate and I really like working with it, and it has the added benefit of being much more palatable than fondant, especially the dark chocolate version. Soo easy to make too!!

Visit sunset for the recipe and some variations!

Chocolate buttercream- makes enough for more than this cake!!
1 lb butter-soft
1 lb confectioners sugar
1 tsp vanilla
3 oz cocoa powder
3 oz melted chocolate (I used a mixture of milk and dark)
milk-as needed

Sift the cocoa powder and sugar. Beat the butter until fluffy, add vanilla, beat, then add the cocoa and powdered sugar in two batches, starting off really slowly to begin! Add the chocolate and beat again. If the mix looks too thick, add some milk until as soft as desired.

Modelling chocolate
1 part chocolate to 1 part corn syrup. Melt chocolate then add corn syrup and mix together. Put in fridge then knead. Keep in fridge wrapped in plastic until needed. Warm with hands before use.

Wednesday, May 27, 2009

Sitting out

I feel all left out this month, I just didnt have the time and energy for the daring bakers strudel. Here's some stuff I was doing instead.

Boston Terrier cupcakes -chocolate mocha mudcake with chocolate kahlua ganache

Chocolate mud cakes with peanut butter/caramel filling and peanut butter frosting, a test for a retirement party. These were so good I'm glad I had one and gave them away immediately!!

Please see the daring cooks website for some of the strudel that everyone made.

Wednesday, May 20, 2009

Cake class-final

Today was our last class with Chef Foran at Grossmont College. I was sad because it was an awesome class and I learned so much. My confidence has really grown and I've learned so much. I'm hoping to start some work experience soon so I can use some of my skills and learn much more.

We were given 4 tiers of dummy cakes, I was really keen to try the square cakes, my team were very apprehensive, but I thought we might as well challenge ourselves as much as possible since we're learning.

I think they were very thankful in the end. We decided on a white cake with red accents, which we saw in a book, which I've forgotten the title of! Jessica made some awesome gumpaste roses, I'd love to learn them, they were spectacular! We all had a go at piping the designs, which we traced on with a pin and then piped over the dots. We also used gumpaste cutouts and some pearls.


Here are most of the cakes all together, amazing how all of the groups came up with such different designs! All very pretty though.

My favourite cake (apart from ours!!) was this one with the beautiful purple flowers and painted vines. This was a really pretty technique and I noticed it seemed relatively quick too, which is always a bonus!

This is the other cake which didnt fit on the main table. An amazingly cheery yellow cake with pretty piping and lots of great flowers. I thought it was a really interesting design too. It would be a bit scary to do with real cake!

This was another fun design which looked like maybe a baby shower cake. They chose to put the top tier on its side, which I thought was in interesting look.

Please see http://www.grossmont.edu/ for more details about culinary classes at grossmont college.

Sunday, May 17, 2009

Cake Class at Confetti Cakes

I had a really fun time in New York with my Mum, but one of the main reasons I was there was for a class with Elise at Confetti Cakes.

We built a 2 tiered square cake in my class. I was really disappointed that I didnt get to decorate it and on reflection I think it might have been more fun to have done a smaller cake and had time for decoration.

Elise is a wonderful teacher, incredibly patient and a total perfectionist. I realised that her cakes are so solid because she takes the time and care to construct them very carefully. I didnt take pictures at every step, but I thought I'd go through the process to remind myself for my next cake.

First we took particle board and cut it to exactly 6" and 9" square for the cakes to rest on. We then took 4 sheets of cardboard and wrapped with foil, dull side up.

We took the frozen cakes and cut them into 3 lots of 9" cake and 3 lots of 6". The middle layer was actually two lots of cake put together, but it stayed together fine. We carefully piped a 1/2 inch layer of swiss buttercream with no gaps, then put the cake together and put in the freezer again to firm up for a couple of minutes.


We cut the cake to make sure it was uniform and left a small gap between the board and the cake for the icing to be flush wi
th the board. This is important, even with round cakes and I realise now that it is very important. It creates a really clean line and really saves time and trouble later.


The next phase was a 'crumb coat' of buttercream. I was reminded never to lift the spatula from the cake, and also to smooth away from the edges. This was tricky and time consuming. A bench scraper was then used to get a really clean line, and the cake was returned to the freezer. For the top layer of frosting, I learned a little trick. We put the buttercream in the microwave until quite runny, it was really easy to apply as a top layer and meant that we didnt have to fiddle around with a hot spatula as the icing was so runny. The cake was put in the fridge to firm up.


The next step was to cover the bottom board with fondant. I'm torn on this, it gives a really nice presentation, but I hate wasting things and it just seems a really expensive waste for me at the moment. I'm glad I learned this, as it is always a nice option for people who would like to spend extra.

Start by rolling the fondant into a square. Be careful to get the thickness even. Roll onto the pin, brush off excess cornstarch.

Place on board and smooth out from the center outwards.

Push the fondant into the board with a fondant smoother until you see a line. Cut with a knife.

If you want to get a knife edge finish to the fondant, you can pinch the edges together.


The cakes were then covered with fondant, which was really hard work. It was really hard to get the fondant smoothed over the corners of the cake. One of the keys is to smooth the fondant on the top, then work downwards. Working with the back of the hand, smooth the fondant down, make sure not to create any creases. This is where Elise became completely exasperated with me being incapable of smoothing down with no creases.

We used a non-toxic glue on top of the fondant base to stick the cake to the base.
A dowel was cut to size and put in the cake to support the top layer. Buttercream was put on the top of the cake to attach the top cake, then the cake was carefully placed on top.
When doing large cakes, it is good to place a wooden dowel right through the middle of the cake. This was actually hammered into the cardboard base for extra stability.

A small piece of fondant was wettened, and added to the top to hide the hole.


Here is my finished cake, very pretty but a bit frustrating since all I can see is the imperfections in the fondant! Thanks so much to Elise for being so patient with me, its given me so much to work with for my future cakes.


Thursday, May 14, 2009

Daring Cooks make gnocci!

A new phase in the daring kitchen started this month, the daring cooks! I decided to join. We'll see if I manage to stick it out for the long haul, things are so hectic that it might just fall by the wayside.


I was really happy when I saw the challenge, gnocci! We love gnocci so I was really looking forward to it. Its actually ricotta gnocci, something I've not tried before.


I was very happy with my local fresh and easy, their ricotta was in a little basket already draining, which really saved me some time!


I was a little disappointed with these, they were very bland. I wish I'd gone ahead and added much more flavor, I decided to go easy on the extras this time. The texture was also a little wierd.

I sauteed some garlic, added a little cream and tossed the cooked gnocci in it.

This was a really fun challenge and I'll definitely be trying making gnocci again, I'd love to recreate the delicious pumpkin gnocci we had in belluno, italy. I remember eating 5 pieces and finding it was enough to fill us to bursting!

Please visit the Daring Kitchen for the recipe and more takes on this delicious meal!

Thanks so much to creampuff and liz for the challenge!

Sunday, May 10, 2009

New York City!

I recently spent a really fun long weekend with my Mum in New York, we made the most of my iphone apps and tried to see everything we could. Here are some of the culinary highlights! For more piccies check out my poor neglected travel blog.

The main focus of the trip for me was a cake class with the lovely Elise from Confetti Cakes, which I'll blog about later!
On the first morning we made our way up to columbus circle and had baked eggs, a great way to start the day.


We later made our way up to wholefoods for a drink and then a lovely salad at Angelicas Kitchen


Dinner was probably the highlight of the trip. I got a really early reservation at babbo and I'm so glad I did. It really lived up to the hype, it was a wonderful experience. We shared softshell crab for an appetizer and my mum enjoyed a rabbit 3 ways for the main course and I enjoyed ricotta ravioli. We had to try dessert, a wonderful hazelnut chocolate cake with gelato. Mmm. I highly recommend trying to get a table there, it is very reasonably priced and a wonderful experience! Very much like a swan, it seems beautiful and serene in the dining room and I'm sure there is an amazing amount of work going on behind the scenes!!


The next day we made our way towards the financial district and decided to get a bagel for breakfast at murrays. It was incredible, it was very stressful trying to order without getting shouted at. The bagel with salmon and cream cheese kept me going all the way to an afternoon cupcake at babycakes, which was a real fun place to visit!


In the evening we thought it would be fun to try the oyster bar at the grand central station. The architecture was so cool and it was so old fashioned. I found my meal to be pretty bland and average, not to mention more expensive than a vastly superior meal the previous evening. Mum enjoyed her sole an awful lot, so that was good.


The next morning we got up and had breakfast near our hotel at cafe europa. Although it was a big chain, you couldnt beat the prices, it was a good breakfast with a fantastic view and we were very happy to be set up for the day.


We were also very happy to check out dean and deluca next to the rockafella centre. Really nice cheesecake with a very cool view where we could check out all the people.


Tuesday, May 5, 2009

Wedding cupcakes!


This weekend was very special, I made 130 cupcakes for a lovely couple of friends who got married. It was stressful, but thankfully they are so sweet and relaxed about everything that it was a really fun experience.


For their actual wedding day I made a banana choc chip cake with chocolate layers, bananas, caramel and it sounds like it went down very well.


For the cupcakes I made banana choc chip, red velvet with cream cheese, dorie greenspans perfect party cupcakes with lemon buttercream, and these mocha mud cakes

Mocha Mud Cakes -womens weekly cupcakes

makes 12 cupcakes

165 g butter
100g dark eating chocolate
290g caster (superfine) sugar
2/3 cup (170ml) water
1/4 cup (60ml) coffee liqueur
2 tablespoons instant coffee granules
150g plain flour
2 tablespoons self raising flour
2 tablespoons cocoa powder
1 egg

Preheat oven to 300f/150c

Combine the butter, chocolate, sugar, water, coffee liqueur and coffee granules and heat on low, stirring until melted together. Whisk the flours and cocoa powder and the egg, and then put into cupcake cases, around 2/3 full.

Bake for 30-40 mins, or until a toothpick comes out clean when put in the cakes.
Ganache topping
100ml cream
100g dark chocolate, chopped
Heat cream until nearly boiling. Add chocolate, leave for 5 minutes then stir until melted. Refridgerate until a little thicker
Freeze the cupcakes for 5 mins, then pour a little chocolate onto them until it reaches the sides of the cake.